1. The first thing you need to do is to download and install PACSY Maker and STRIDE (refer to the programs tab above).
2. Make sure "stride" and "PacsyMakerQT" are executable by setting the environmental path to (link to /usr/local/bin) or something similar. Also, MySQL server program should be installed prior to DB insertion.
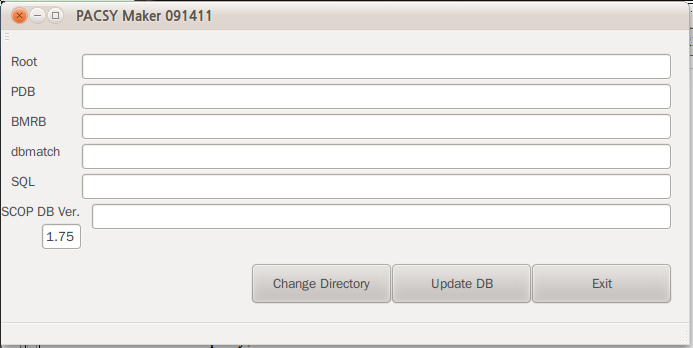
3. Run PacsyMakerQT
# PacsyMakerQT
You will see the PacsyMaker dialog if the PacsyMaker program has been installed correctly.

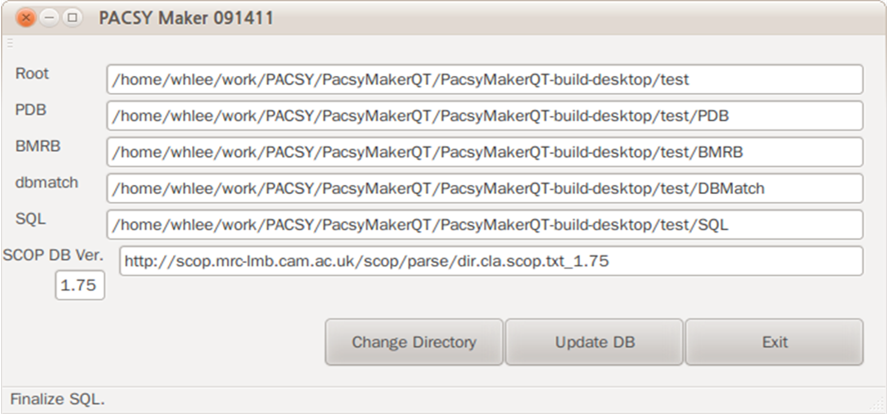
4. Click the "Change Directory" button to select your working directory. Make sure the directory is writable. The top four edit boxes will be filled automatically with relative paths to the root directory.
5. Open SCOP website with your web browser and check the latest version of SCOP. Type the version in the box located below SCOP DB Ver., and press <enter>.
6. Click the "Update DB" button to generate a MySQL insertion script file and database SQL dump files for upload purposes. Upload will take about a day (depending on your Internet connection and CPU power).
7. When the generation is finished, you will see "Finalize SQL" in the status bar at the bottom.

8. Go to the SQL directory and edit insertion scripts for your MySQL account.
# cd $PACSY_DIR/SQL
# vim insertSQL.sh
:%s/USER/<DB user name>/g
:%s/PASSWORD/<DB password>/g
:wq!
9. If the PACSY database is being built for the first time or if a clean build from scratch is desired, you need to uncomment the following line in the initdb.dmp.
# vim initdb.sh
#DROP DATABASE IF EXISTS pacsy; to DROP DATABASE IF EXISTS pacsy;
#CREATE DATABASE pacsy; to CREATE DATABASE pacsy;
This can be done by typing "x" at the "#".
:wq!
10. Now you are ready to submit your data to the MySQL server. Type the following, and relax for a couple of hours.
# ./insertSQL.sh
Use of PACSY Analyzer
1. The first thing you need to do is to download and install PACSY Analyzer (refer to the programs tab above).
2. Make sure "PacsyAnalyzer" is executable by setting the environmental path link to (/usr/local/bin) or something similar. The PACSY database must be running if you want to submit SQL sentences.
3. Run PacsyAnalyzer.
# PacsyAnalyzer
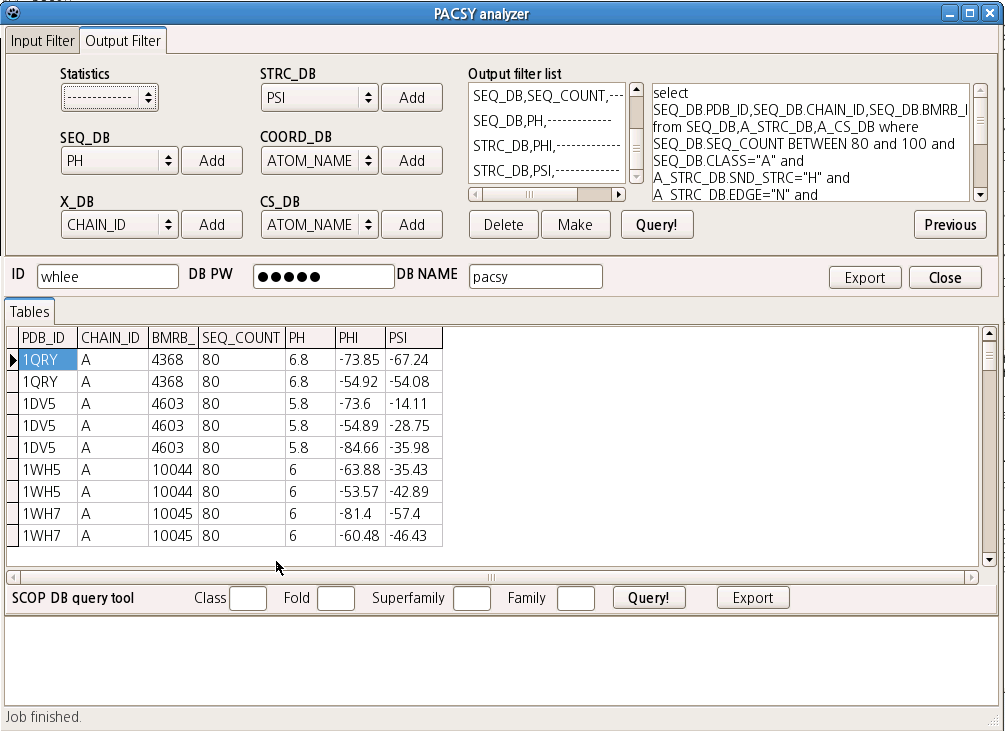
4. Fill Input Filter tab. You can add any supported conditions to be browsed in this tab. In this example, the CAs of Ala in all-alpha helical proteins whose secondary structures were assessed as alpha helices were selected to be searched.

5. Fill Output Filter tab. In this tab, you add filters to select the data that you want to extract from the PACSY database. You can also add statistics options for numerical fields such as C_SHIFT, PHI, and PSI. After adding filters, click the "Make" button to generate a SQL sentence. If you have a PACSY server running on your system, you can click the "Query!" button to submit the query. If not, please refer to the instant use tab above.

Script Example
Here is a Python script example for using PACSY. The compressed file contains 6 Python script files. They calculate PACSY statistics. The file are very compact and easy to understand. They should provide some insight into how PACSY can be used to achieve your goals.
PACSY_scripts.tar.gz [click to download]